Custom Timber Posts Alias Modules
Update
As of Beaver Builder version 2.7 you can use something called ACF Blocks. See the section about ACF WP Blocks to learn more about using those with Beaver Builder.
A little known fact to Beaver Builder modules is the use of so-called Module Aliases. You’ve probably already used some yourself without even knowing it:
Module Aliases are regular modules, with settings that (may) differentiate from the default-values. In Beaver Themer for instance, there are Module Aliases that let you drag a Masonry Grid on the layout, but it basically is a Post Module, with some setting already applied.
Benefits of using a Module Alias
One of the main reasons of using a module alias is that it trumps the need of creating an entire new module, which has only a slightly different need, and will now need code changes in two different places.
Module Aliases allows it to act as two or more seperate Modules and share the same codebase, which makes is much more efficient.
How is this useful for you?
The Timber Posts Module is a way to get things done in your layout that otherwise would be needing either a custom module, or a custom shortcode. Both require you to code that in either in a plugin or your theme’s functions.php and that code needs to remain active for as long as you want that functionality on your site.
The Timber Posts Module allows you to write a template to do the same on the fly. But you still need to write the template over and over again, even if you have a solid starter-template for a certain feature.
Ok, so that’s exactly where the Module Alias comes in handy! You can roll your own Timber Posts module alias plugin, use it to add your frequently used layouts WITH custom-settings and remove that plugin when you’re done!
Let’s start with a simple example
To illustrate this a little better, we are going to create a UIkit Tile Module Alias, in a way that you can add your own content and set the tile’s style. This way you can add multiple tiles across your layouts very easily.
If you don’t know what UIkit is, you can have a look here.
Copy the code below to your theme’s functions.php
php // do not copy this line

/**
 * Make sure to init the alias with a low priority (higher number) otherwise BB won't see it
 */
add_action( 'init' , 'toolbox_example_alias_module' , 100 , 1) ;

function toolbox_example_alias_module() {
    /**
     * ACF Timber alias
     * UIkit Tile
     * @since 1.1
     */
    FLBuilder::register_module_alias( 'uikit-tile', array(
        'module'      => 'acftimber',
        'name'        => __( 'UIkit Tile', 'toolbox-uikit' ),
        'description' => __( 'UIkit Tile', 'toolbox-uikit' ),
        'group'         => __( 'Toolbox UIkit', 'toolbox-uikit' ),
        'category'    => __('Misc', 'toolbox-uikit'),
        'enabled'           => true,
        'settings'    => array(
            'timber_template'         => '


                    {{__node__.tile_content|default("")}}

            ' ,
            'settings_form_name'    => 'toolbox_acftimber_form_uikit_tile',

        ),
    ) );

    FLBuilder::register_settings_form('toolbox_acftimber_form_uikit_tile', array(
        'title' => __('Settings', 'textdomain'),
        'tabs'  => array(
            'general'      => array(
                'title'         => __('General', 'textdomain'),
                'sections'      => array(
                    'general'       => array(
                        'title'         => '',
                        'fields'        => array(
                            'tile_style' => array(
                                'type'    => 'button-group',
                                'label'   => __( 'Tile Style' , 'textdomain' ),
                                'default' => 'default',
                                'options' => array(
                                    'default'    => 'Default',
                                    'muted'    => 'Muted',
                                    'primary'  => 'Primary',
                                    'secondary'  => 'Secondary',
                                ),
                            ),
                            'tile_content' => array(
                                'type'          => 'editor',
                                'media_buttons' => true,
                                'rows'          => 10,
                            ),

                        )
                    ),
                )
            )
        )
    ));
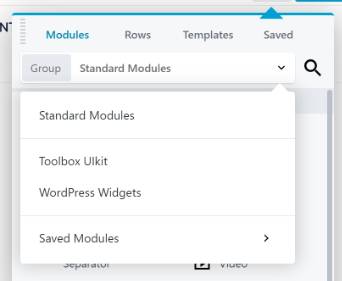
}After you’ve saved the changes, reload your Beaver Builder Editor and locate the newly added Module Group:
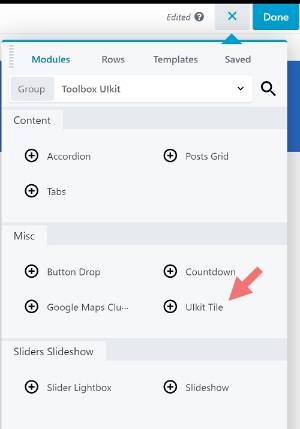
Now you can drag in the Module (Alias) into your layout.
One thing that might strike you, is that the Module is still called “Timber Posts”. That’s because in fact it IS a Timber Posts Module, with our templated already applied!
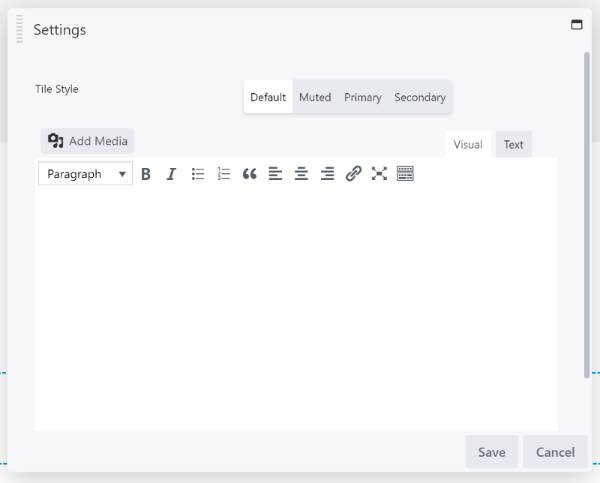
But we have also added a form with it’s own custom settings which is showing by the “Edit Settings” button. When we click it, the settings panel will open.
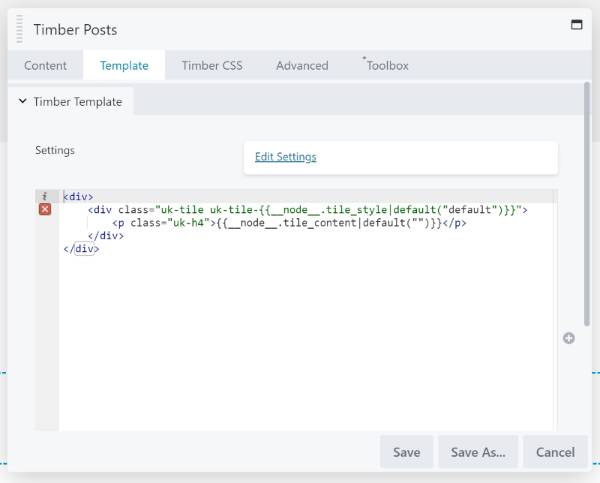
Ather you’ve made your settings and saved them, they are applied within the template. As you might have derived from the template the __node__ variable holds the values set by the settings-form.

What happens when you remove the module alias code?
That’s the best part of it all: nothing happens! To your layout that is. The reason for that is that all settings are stored inside the node (the module instance). You will only lose the ability to reset the values using an interface, but if you apply a simple trick you will always be able to manipulate, even if that happens.
The __node__ variable accesses the settings saved in the nodes and will continue to do so even when the settings form is removed. So, passing those values through a proxy-variable that can be set in the template will enable you to control the output even when the settings panel isn’t showing any more.
We create a variable called settings in the top of the template, and set the key values to match the __node__ settings we have. this way, we can always override the settings in the future without altering the template, but only by setting the key for the settings-variable.
php // do not copy this line

/**
 * Make sure to init the alias with a low priority (higher number) otherwise BB won't see it
 */
add_action( 'init' , 'toolbox_example_alias_module' , 100 , 1) ;

function toolbox_example_alias_module() {
    /**
     * ACF Timber alias
     * UIkit Tile
     * @since 1.1
     */
    FLBuilder::register_module_alias( 'uikit-tile', array(
        'module'      => 'acftimber',
        'name'        => __( 'UIkit Tile', 'toolbox-uikit' ),
        'description' => __( 'UIkit Tile', 'toolbox-uikit' ),
        'group'         => __( 'Toolbox UIkit', 'toolbox-uikit' ),
        'category'    => __('Misc', 'toolbox-uikit'),
        'enabled'           => true,
        'settings'    => array(
            'timber_template'         => '
{%
    set settings = {
            "tile_style" : __node__.tile_style|default("default") ,
            "tile_content" : __node__.tile_content|default("")
    }
%}


        {{settings.tile_content}}


' ,
            'settings_form_name'    => 'toolbox_acftimber_form_uikit_tile',

        ),
    ) );

    FLBuilder::register_settings_form('toolbox_acftimber_form_uikit_tile', array(
        'title' => __('Settings', 'textdomain'),
        'tabs'  => array(
            'general'      => array(
                'title'         => __('General', 'textdomain'),
                'sections'      => array(
                    'general'       => array(
                        'title'         => '',
                        'fields'        => array(
                            'tile_style' => array(
                                'type'    => 'button-group',
                                'label'   => __( 'Tile Style' , 'textdomain' ),
                                'default' => 'default',
                                'options' => array(
                                    'default'    => 'Default',
                                    'muted'    => 'Muted',
                                    'primary'  => 'Primary',
                                    'secondary'  => 'Secondary',
                                ),
                            ),
                            'tile_content' => array(
                                'type'          => 'editor',
                                'media_buttons' => true,
                                'rows'          => 10,
                            ),

                        )
                    ),
                )
            )
        )
    ));

}
